

Forcella Anteriore RST 381 EL
|
2000 RST SPARE PARTS LIST |
||||
|
CF |
381EL |
|||
|
Id.No. |
PART NO. |
DESCRIPTION |
Q'TY |
|
|
1-1 |
H5FR7-2160-000 |
Adjuster |
2 |
|
|
1-2 |
M5FC1-2160-000 |
Spring Guide |
4 |
|
|
1-3 |
M5FCU-2310-000 |
Spring Insert |
2 |
|
|
1-4a |
MF2350-175-048 |
Coil Spring(Blue) |
Soft. |
2 |
|
or1-4b |
MF2350-175-065 |
Coil Spring(Natural) |
Standard. |
2 |
|
or1-4c |
MF2350-175-085 |
Coil Spring(Orange) |
Medium/Hard. |
2 |
|
or1-4d |
MF2350-175-125 |
Coil Spring(Red) |
Hard. |
2 |
|
2 |
M5FC1-2164-011 |
X Spacer |
2 |
|
|
3 |
H5FKU-2160-000 |
Compression Rod |
2 |
|
|
4 |
M5FKP-2313-000 |
Top-Out Bumper |
2 |
|
|
5 |
M5FKU-2350-000 |
Top-Out Spring |
2 |
|
|
6-A |
H5FCF-2254-000 |
Crown Assembly(Head Parts 27mm) |
1 |
|
|
or6-B |
H5FCF-2254-100 |
Crown Assembly(Head Parts 26.4mm) |
1 |
|
|
or6-C |
H5FCF-2286-000 |
Crown Assembly(Head Parts 30mm) |
1 |
|
|
7 |
M5FK5-2310-000 |
Top-Out Bumper |
2 |
|
|
8 |
M5FA1-2310-000 |
Boot |
2 |
|
|
9 |
M5FA1-2610-000 |
Dust Wiper |
2 |
|
|
10 |
M5FKD-2722-000 |
Pivot |
2 |
|
|
11 |
M5FC1-2Y20-000 |
Washer |
2 |
|
|
12 |
HFCF-2810CV0000 |
Outer Leg Assembly |
Silver Inc. bushings. |
1 |
|
13-1 |
M5FAJ-2160-000 |
Cable hanger |
1 |
|
|
13-2 |
M5FA2-2Y13-100 |
Bolt |
1 |
|
|
14 |
M5FDB-2Y10-000 |
Bolt |
2 |
|
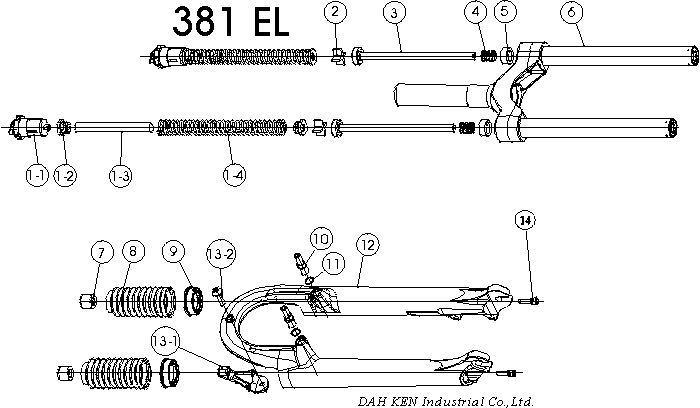
| TOOLS REQUIRED:
4mm Hex wrench. RST Adjuster Cap Wrench (Medium). RST 8mm Hex Wrench (Optional). Non toxic cleaning solvent. Cleaning rag. Cleaning brush. Grease (Non-lithium based). |
|
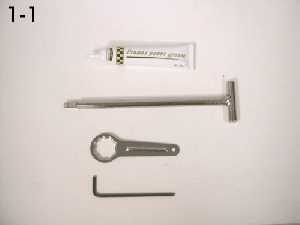
| Front view of: RST Gamma TL Fork. |
|
| Use a 4mm hex wrench to remove the drop out bolts (x2) from the outer legs. |
|
|
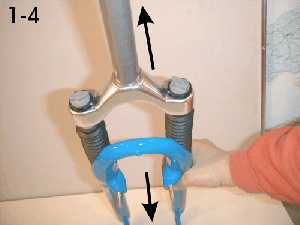
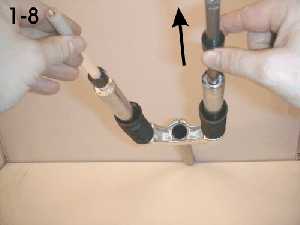
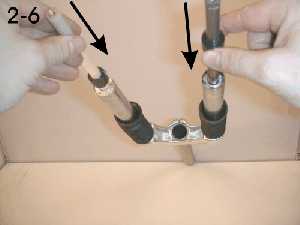
Release boots from the dust wipers. Separate the outer legs from the stanchions by pulling them apart. |
|
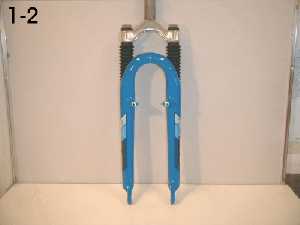
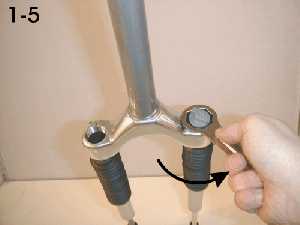
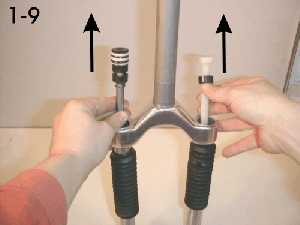
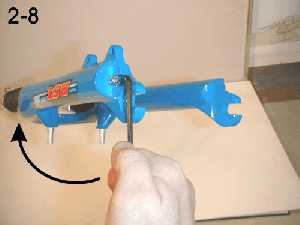
| Use an RST adjuster wrench to remove the adjuster caps (x2) by turning them counter-clockwise. |
|
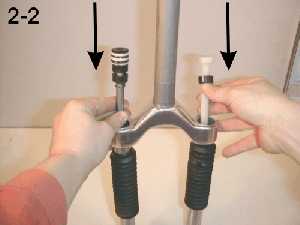
| Remove the stacks of springs or MCU's (x2). |
|
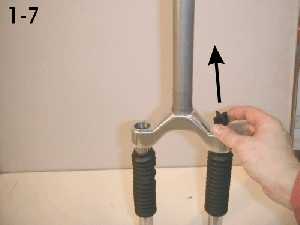
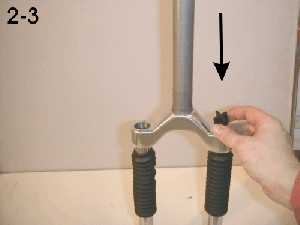
| Remove the X spacer (s). |
|
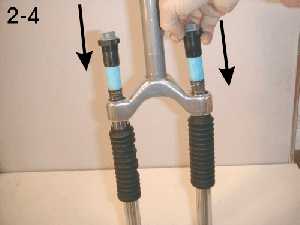
| Remove bottom out bumpers (x2). |
|
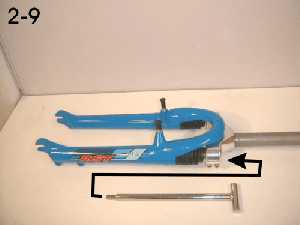
| Remove both compression rods and top out bumpers (x2). |
|
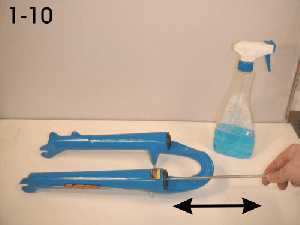
| Clean all parts using
a Non-toxic cleaning solvent and a
cleaning brush.
Allow parts to dry. |
|
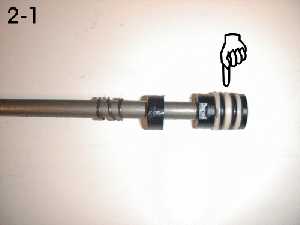
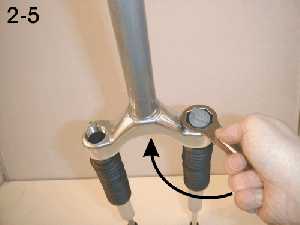
| Lightly apply grease between both 'O' rings on the air valve (s). |
|
| Lightly apply grease to the compression rods (x2) and insert them back in to the correct stanchion. |
|
| Replace any X spacer (s) that were removed. |
|
| Cover the stack of springs or MCU's (x2) with grease before inserting back in to stanchions. |
|
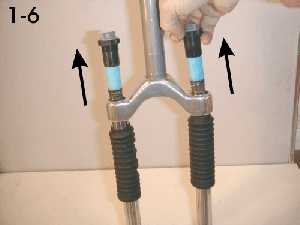
| Use an RST pre load wrench to tighten the adjuster caps (x2) by turning them clock wise. |
|
| Lightly grease the bottom out bumpers (x2) and replace them on to the compression rods (x2). |
|
| Carefully insert the outer legs back on to the stanchions.
Be careful not to damage the dust wipers. Re fit boots over dust wipers. |
|
| Replace the drop out bolts (x2) and tighten using a 4mm hex wrench.
NOTE: torque setting = 60kg/cm. |
|
| If the drop out bolts can not be removed or replaced.
(During steps 1-3 or 2-8).
Remove the spring or MCU's and X spacer (s) before inserting the optional RST 8mm hex wrench to hold the compression rods from inside. |
|

in collaborazione con www.valtline.it - www.valtline.com